Guides
How to Setup KMBox NET
Learn how to set up KMBox Net step-by-step with our comprehensive guide. From unboxing to configuration.

KMBox Updates
-
20/12/2024
-
10 Minute Read
Setting up your KMBox Net might seem daunting at first, but with the right guidance, it’s a straightforward process that anyone can handle. In this guide, we’ll break everything down into simple steps, covering everything from unboxing your KMBox Net to configuring it for optimal performance. Whether you’re new to the device or just need a quick refresher, this tutorial has you covered!
1. Connecting to the KMBox Net
All software setup/installation is done on the second computer (Radar PC) that is connected to your DMA card via USB. DO NOT install/setup this software on the main computer (Gaming PC) in which you installed the DMA card. Installing files onto the wrong computer may result in detections.
Connect the KMBox according to the picture below:

2. Powering On
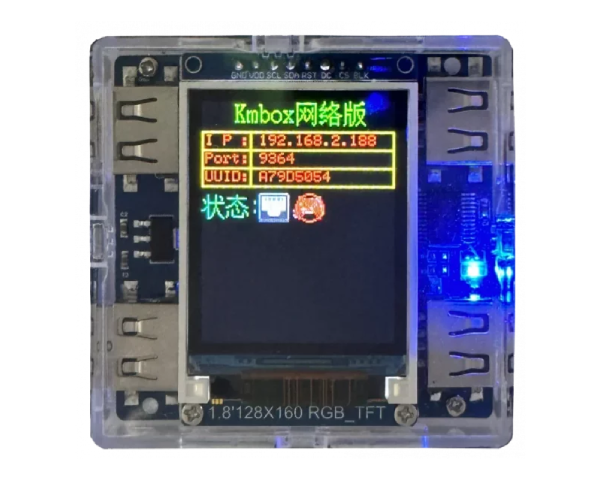
After connecting the KMBox to both computers, it will power on and you will see the following screen:
3. Download and Install the WCHUSBNIC Driver
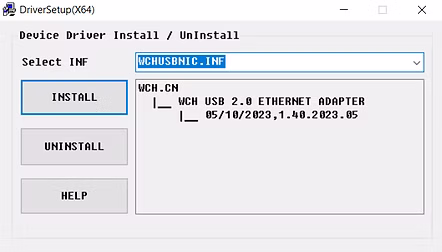
Download and run the WCHUSBNIC driver as admin on the 2nd PC (Radar PC):
Download Driver
Click "Install" to install the driver:

4. Verify Installation Success
You should see a "Driver Install Success!" message:
5. Reboot and Network Configuration
Once the driver installation is complete, reboot the second PC (Radar PC). Ensure that both your main PC (Gaming PC) and second PC (Radar PC) are connected to the same local network (e.g., your home Wi-Fi).
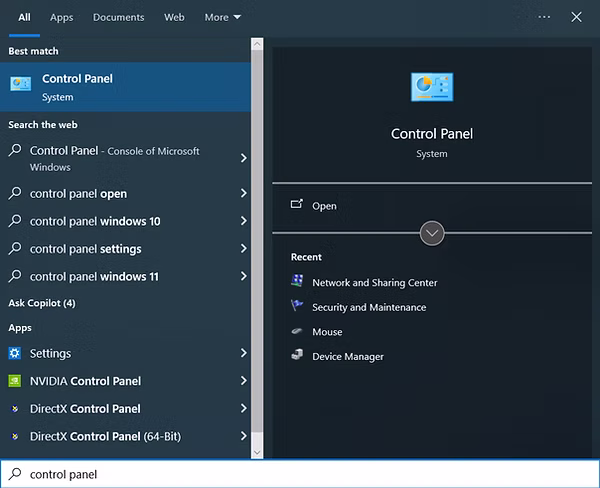
Next, open Control Panel on the second PC and follow these steps:
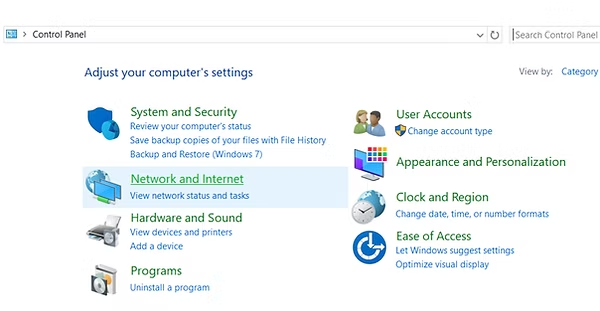
Go to Network and Internet:
Then, open Change Adapter Settings:

Look for the "USB 2.0 Ethernet Adapter" device. If you don't see this, disconnect and reconnect the KMBox cable. Right-click the device and go to Properties.
6. Adjust Protocol Settings
Make sure "Internet Protocol Version 6 (TCP/IPv6)" is disabled:
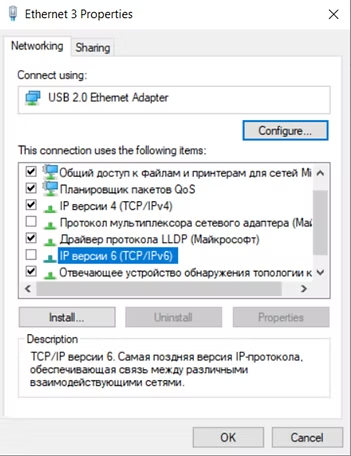
Ensure "Internet Protocol Version 4 (TCP/IPv4)" is enabled. Click on it and go to Properties:
Set the properties as follows:
- IP Address: 192.168.2.100
- Subnet Mask: 255.255.255.0
- Leave other fields empty
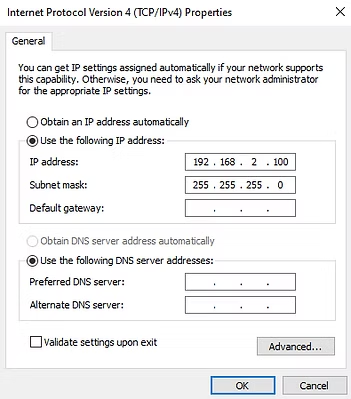
Click OK to save the settings.
7. Testing the KMBox Net
Your KMBox Net is now ready to use. To test if it’s working correctly, open a Command Prompt window and type:
ping 192.168.2.188
If working correctly, you will see replies back from the KMBox Net.
8. Using KMBOX NET With Cheats
When you start the cheat for the first time, you will need to enter the data from your KMBox Net.:
- Open the cheat loader on your second PC (Radar PC).
- We Will Use Direct's Loader For This Example
- Enter the KMBox's IP / Port and ID provided on your device's screen.
- Save the configuration and proceed.

After saving, your KMBox Net will be ready to use with the configured cheat settings.


DO NOT ACTIVATE KMBOX
If your KMBox hasn't been activated before August 31st, do not activate as it can cause issues.